> ## Documentation Index
> Fetch the complete documentation index at: https://docs.thoras.ai/llms.txt
> Use this file to discover all available pages before exploring further.
# Quickstart
> Deploy Thoras and see Kubernetes resource recommendations in minutes!
## Overview
This guide will walk you through how to quickly install Thoras and get to see
resource recommendations for your workloads in just a few minutes.
## What you'll need
1. Your Thoras license key (email
[support@thoras.ai](mailto:support@thoras.ai) if you don't have one)
2. [Helm](https://helm.sh/)
3. Privileged access to a Kubernetes cluster
4. The cluster should have
[Kubernetes metrics server](https://github.com/kubernetes-sigs/metrics-server)
installed. It probably already has this!
For optimal forecast accuracy and full Autonomous Mode support, Thoras needs a
Kubernetes Persistent Volume (PV) to store historical metrics.
This QuickStart intentionally skips that setup so you can get the product
running quickly and start exploring waste insights right away. If you prefer to
include the PV during initial installation, review the
[Configure Persistent Volume](../installation/advanced-setup#persistent-volumes)
before proceeding with the [Install Thoras](#install-thoras) steps below. You
can also always add a PV as a follow-on step.
## Install
Let's get Thoras up-and-running!
### Use the Thoras Helm repo
Install the Thoras Helm repo, which will give you access to all of the Thoras
Helm charts.
```
helm repo add thoras https://thoras-ai.github.io/helm-charts
helm repo update thoras
```
### Install Thoras
1. Note the name of your license key file. We'll use `thoras_license.txt` in our
example below.
2. Install Thoras via Helm:
```
helm install thoras thoras/thoras \
--namespace thoras \
--create-namespace \
--set imageCredentials.password="$(cat ./thoras_license.txt)"
```
Chart includes sane defaults; see
[GitHub documentation](https://github.com/thoras-ai/helm-charts/tree/main/charts/thoras#values)
for details.
Need to set up license secret externally? See
[Advanced Setup](../installation/advanced-setup#option-2%3A-reference-existing-secret).
### Verify installation
It should only take 1-2 minutes for all Thoras pods to come online. Verify that
all pods are healthy by confirming their `Running` status:
```
kubectl get pods -n thoras
```
Once all pods are in `Running` status, congratulations! You've successfully
installed Thoras!
## Get Workload Resource Recommendations
Now that Thoras is up and running, we're just minutes away from getting resource
recommendations that will help our workloads run more efficiently -- saving on
cloud costs while boosting reliability.
### View the dashboard
We'll be working out of the Thoras Dashboard from here on out. To access it:
1. Port-forward to the dashboard pod
```
kubectl port-forward service/thoras-dashboard -n thoras 8080:80
```
1. Pull up the dashboard in your browser: [http://localhost:8080](http://localhost:8080)
Thoras will auto-discover workloads in your cluster and give you the option to
onboard all the workloads in a namespace - zero configuration needed! This is a
great way to experiment and see the value of Thoras quickly!
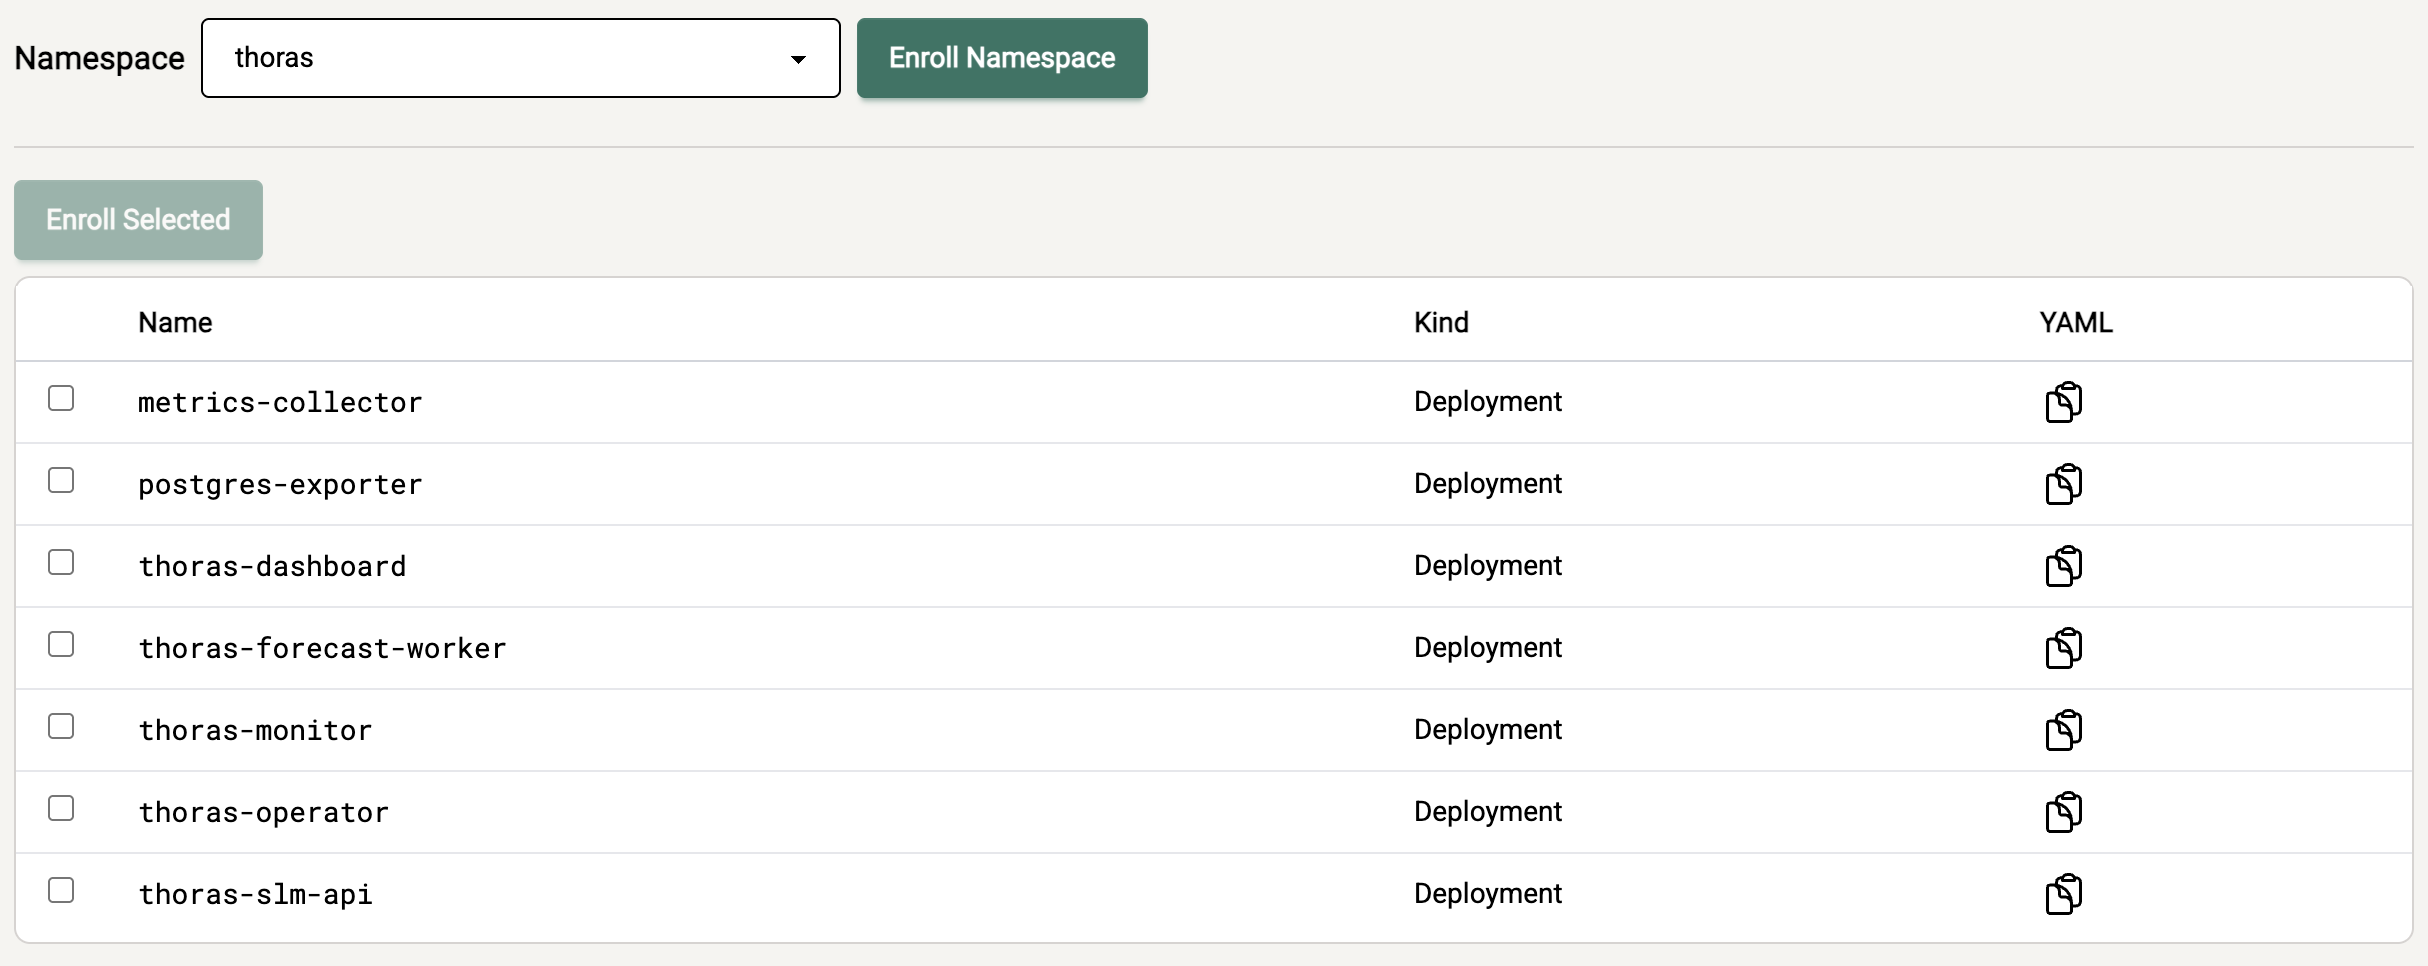
2. Select a namespace from the dropdown and click "Enroll Namespace" to enroll
all associated workloads, or alternatively select individual workloads from
the table below and click "Enroll Selected" to specify the workloads you'd
like to target. This will enroll workloads into `Recommendation Mode` so they
may begin receiving resource recommendations. This is a read-only operation
\-- no changes will take place to your workloads.
 3. You'll see a new popup where Thoras tells you it's populating
`AIScaleTargets` for you
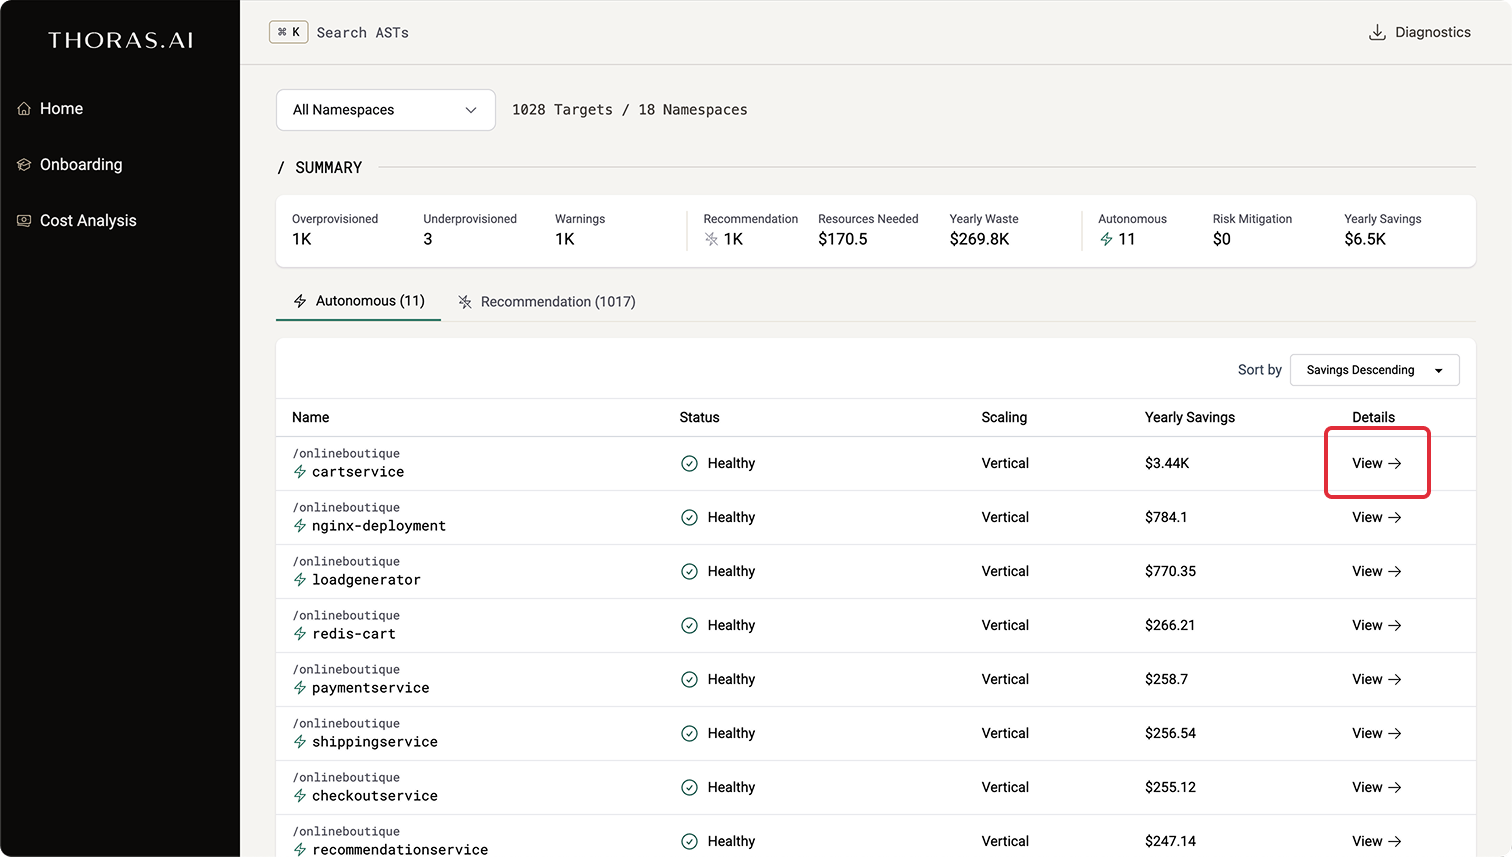
4. Once complete, you'll see a list of onboarded targets under the
Recommendation tab on the Home page. Click "View" to see more!
3. You'll see a new popup where Thoras tells you it's populating
`AIScaleTargets` for you
4. Once complete, you'll see a list of onboarded targets under the
Recommendation tab on the Home page. Click "View" to see more!
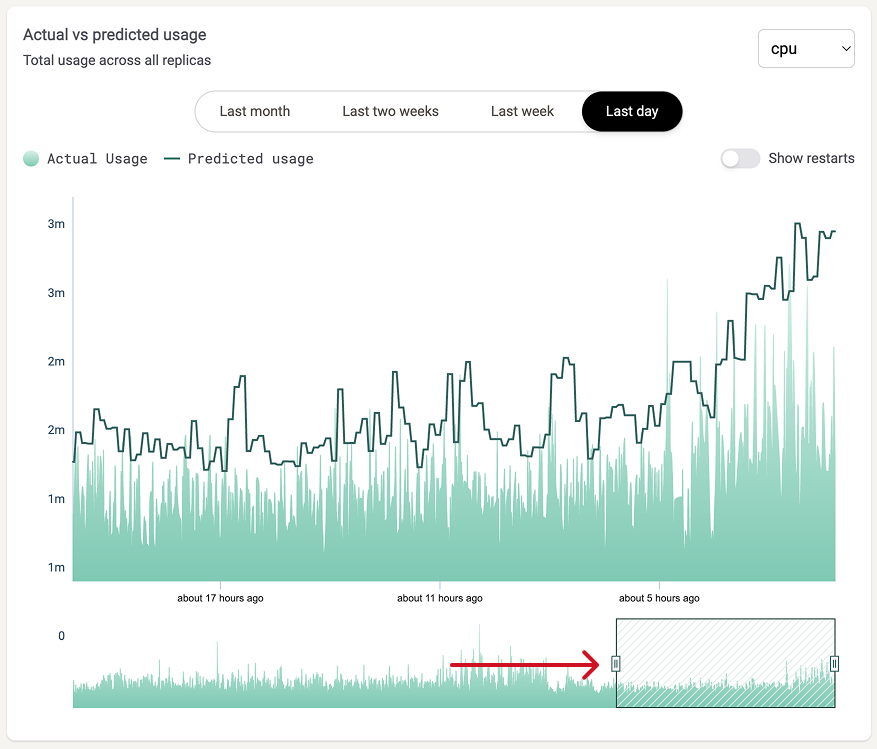
 5. You should immediately see metrics beginning to collect! Use the slider below
the graph to narrow the time window.
5. You should immediately see metrics beginning to collect! Use the slider below
the graph to narrow the time window.
 6. Predictions will run on a 15m interval. Grab a cup of coffee! ☕
### Replica and resource recommendations
Predictions will become more accurate over time as the Thoras Reasoning Engine
learns more about your environment. But we can still get useful predictions even
on the first forecast! Let's dive in.
#### Workload efficiency at a glance
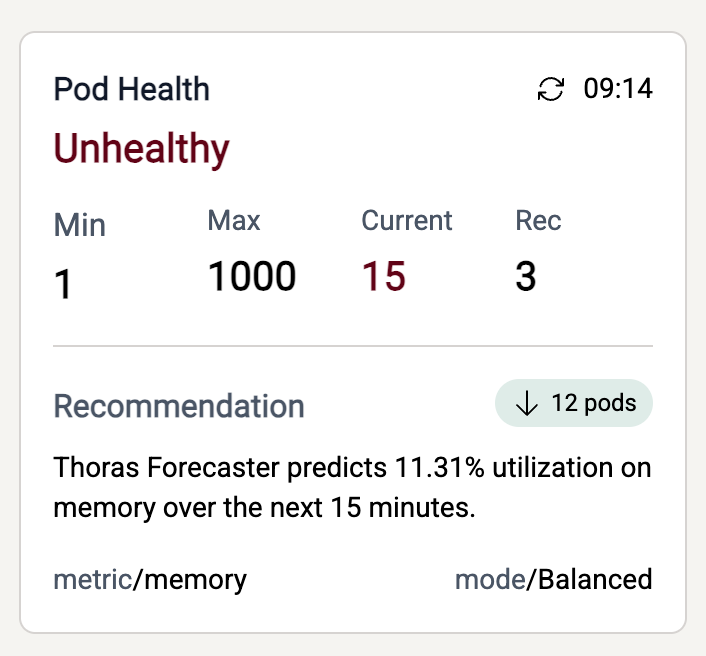
The `Pod Health` widget will give you a quick overview of replica count
recommendations and workload's overall resource utilization.
6. Predictions will run on a 15m interval. Grab a cup of coffee! ☕
### Replica and resource recommendations
Predictions will become more accurate over time as the Thoras Reasoning Engine
learns more about your environment. But we can still get useful predictions even
on the first forecast! Let's dive in.
#### Workload efficiency at a glance
The `Pod Health` widget will give you a quick overview of replica count
recommendations and workload's overall resource utilization.
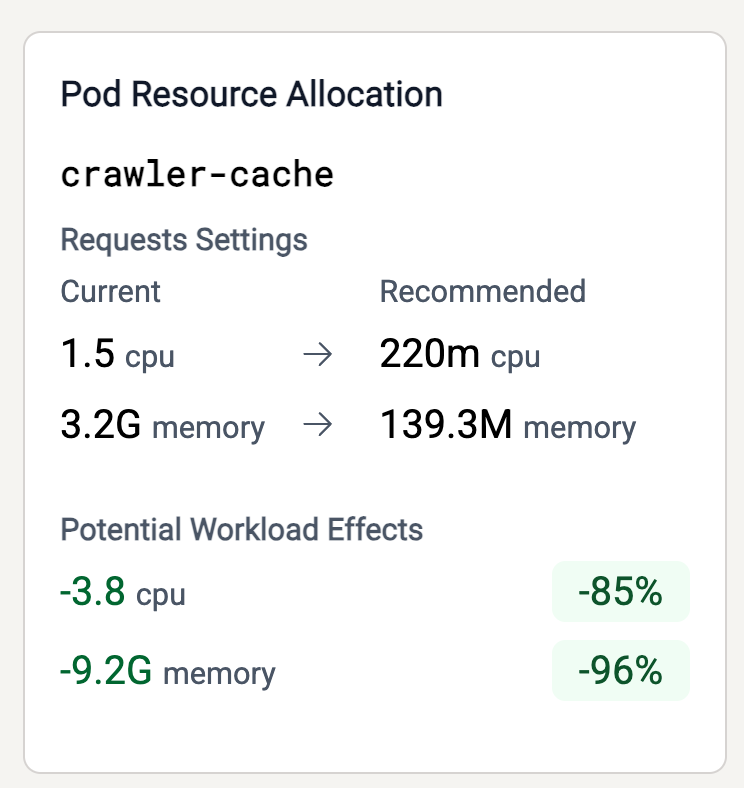
 #### Pod resource recommendations
Check out how much more efficiently, reliably, and cost-effectively your
workloads could be running in the `Resource Allocation Settings` widget.
#### Pod resource recommendations
Check out how much more efficiently, reliably, and cost-effectively your
workloads could be running in the `Resource Allocation Settings` widget.
 ## Getting support
For any questions, email [support@thoras.ai](mailto:support@thoras.ai).
## Getting support
For any questions, email [support@thoras.ai](mailto:support@thoras.ai).